
Photoshop Vignettes 1
A vignette here is a photograph, illustration etc., in which the tones fade gradually away until they blend to the background color or with the surface they are printed on.
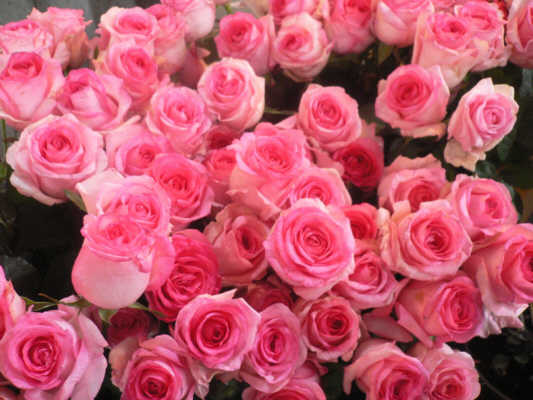
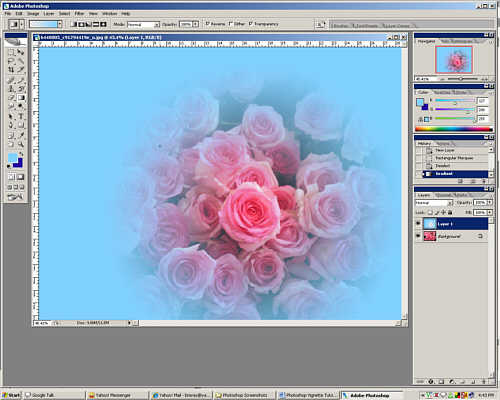
In these pages what I want to achieve is to turn this...
into this...

There are at least six ways to do this. This first uses a graduated transparent fill; the second uses a transparent graduated fill on a mask. As Photoshop has no ellipse
fill the result will be a round vignette. The third uses a mask, selection and a Gaussian blur. The forth method is by using a feathered selection, the fifth uses a
feathered selection on a mask and the sixth uses third party plugins, of which they are several. Some of these are obtainable for free.
The advantage of methods 2 and 3 is that the background colour is on a separate layer and can be changed at any time – provided you keep the work in a format that does not
destroy the layer information such as Photoshop’s PSD format. You can also do away with the background layer altogether and save the file as a GIF, PNG or any other format
that supports the transparent nature of the image.
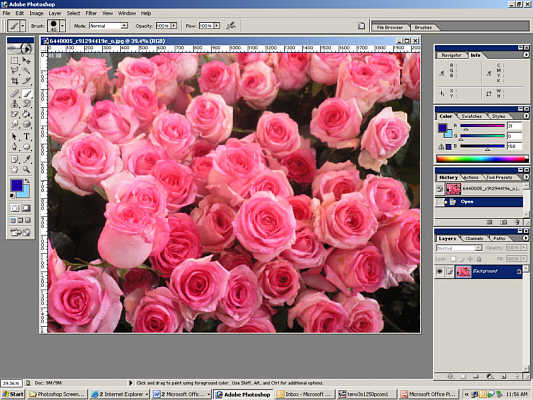
Whichever method is used the initial image has first to be opened in Photoshop…
Method 1 – Using a Graduated Transparent Fill
Using this method the background does not have to be turned into a normal layer and the graduated transparent fill can be done directly onto the image but I like to use a separate layer for these operations.
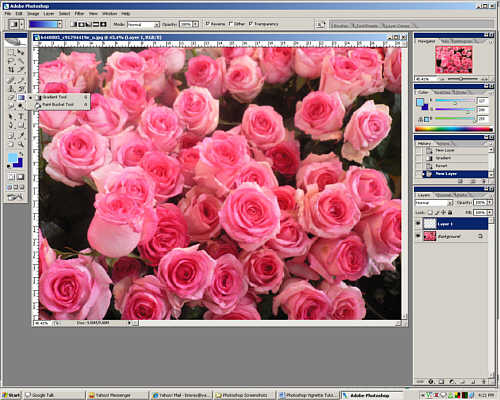
| Create a new layer by either clicking on the "Create a new layer" icon (square within a square) on the bottom of the layers menu (bottom right of the
screen) or click on Layer > New > Layer… Click and hold the mouse cursor down over the Paint Bucket Tool in the left hand menu and choose Gradient Tool. |
 |
| Click on the graduated fill box that appears in the top left of the main toolbar and from the fill types choose "Foreground to Transparent". This should be the second icon from the left on top row of the menu that appears… | 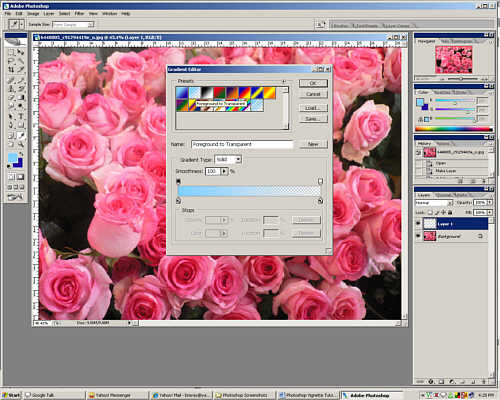 |
 |
|
| From the type of fill on the top toolbar choose the Radial Gradient. On the top menu there will be three checkboxes. Ensure that the Reverse and Transparency checkboxes are checked. Because the fill goes from foreground to transparent when you choose the filled area if the Reverse checkbox is not checked then you will get a solid colour in the middle fading to transparent, we want the opposite effect. The transparent fill simple does not work if the Transparency checkbox is not checked – the fill simply becomes a solid colour. Place your mouse cursor over the centre part of the image that will become your vignette and drag the cursor to one of the edges of the image. When you release the mouse button the image will be filled from transparent to solid colour. |
 |
Method 2 - Using a Transparent Graduated Fill on a Mask
| This base image or background has to be turned into a layer. Do to this double click on "background" in the layers menu (bottom right of the screen) or by clicking on Layer > New > Layer from Background. | 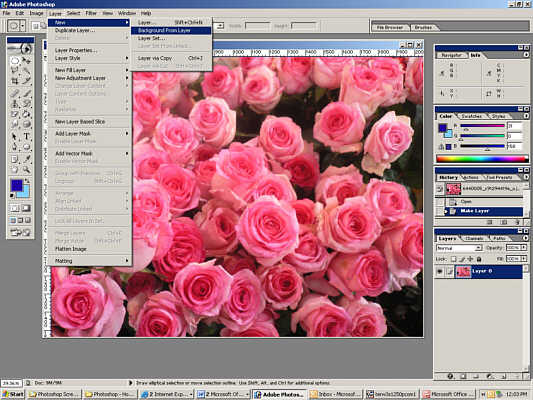 |
| Click on the "Add Layer Mask" icon (an ellipse inside a circle) on the bottom of the layers menu (bottom right of the screen) or click on Layer > Add Layer Mask > Reveal All | 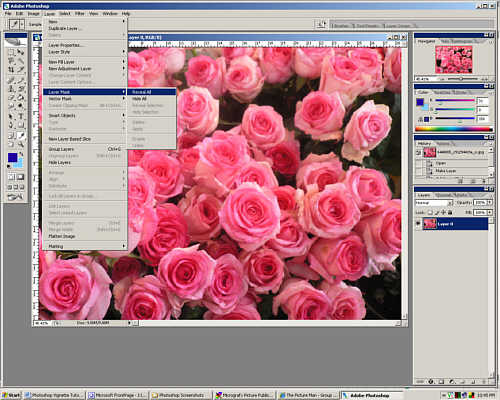 |
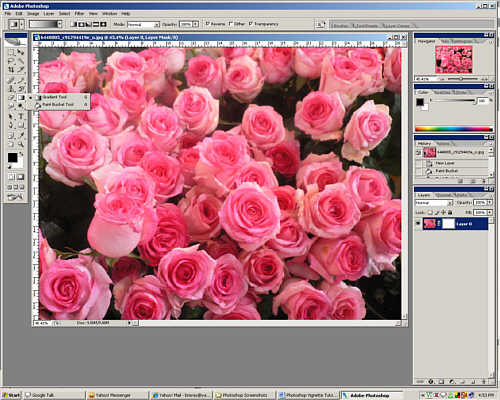
| Make sure the mask is highlighted not the image in the layers menu – the colour palette will change to simply black and white. As with all layer masks, black
makes the mask opaque, white makes the mask transparent and shades of grey represents everything in between. Click and hold the mouse cursor down over the Paint Bucket Tool in the left hand menu and choose the Gradient Tool. |
 |
| Click on the graduated fill box that appears in the top left of the main toolbar and from the fill types choose "Foreground to Transparent". This should be the second icon from the left on top row of the menu that appears… | 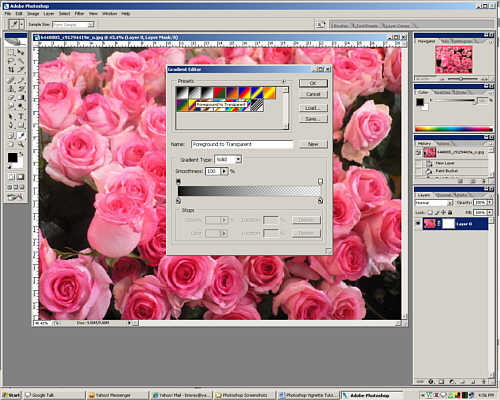 |
 |
|
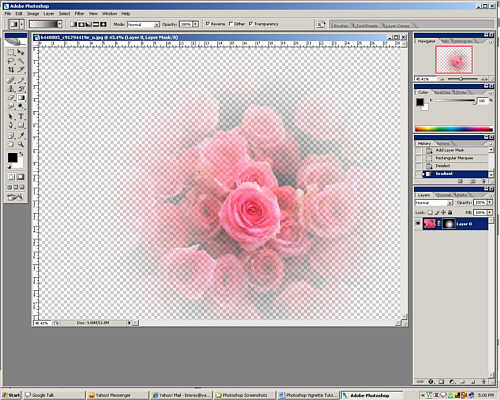
| From the type of fill on the top toolbar choose the Radial Gradient. On the top menu there will be three checkboxes. Ensure that the Reverse and Transparency checkboxes are checked. Because the fill goes from foreground to transparent when you choose the filled area if the Reverse checkbox is not checked then you will get a solid colour in the middle fading to transparent, we want the opposite effect. The transparent fill simple does not work if the Transparency checkbox is not checked – the fill simply becomes a solid colour. Place your mouse cursor over the centre part of the image that will become your vignette and drag the cursor to one of the edges of the image. When you release the mouse button the image will be filled from clear to transparent. That sounds a bit odd, but you can see what I mean in the image... |
 |
| Create a new layer and fill that with the colour of your choice. | 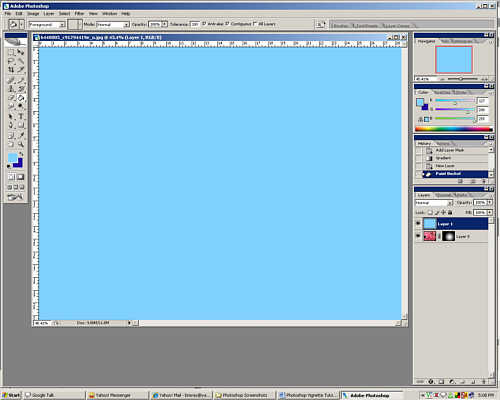 |
| Oops – not quite what we want, but simply rearrange the layers by dragging this new layer under the old layer in the layers menu. | 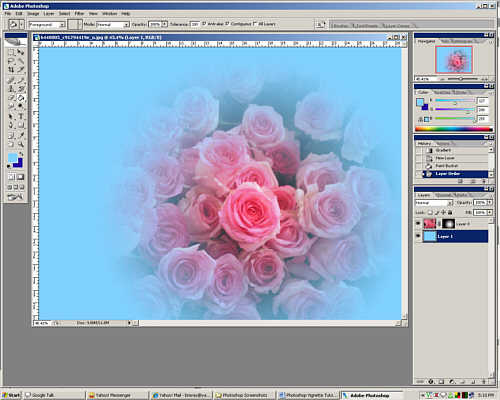 |
This page created 19th April 2007, last modified 20th April 2007
